Load A Scene on Button Click in Unity
A scene in Unity stores the content of your game. Every game in Unity has a scene, and most games have multiple scenes. Because of this, you will need to learn how to load between scenes. Buttons are used a lot when transitioning to a new scene.
In Unity, to load a scene on a button click, add a button from the UI Manager, create a function that transitions to another scene, then add that function to an On Click () event attached to the button.
There are several parts to using a button for a scene transition. First, you need at least two scenes saved and set in the Build Settings, you need a UI Button, an OnClick() event for when the button is clicked by the user, and a function that actually changes the scene.
How Do You Add a Scene to a Project in Unity?
Adding a scene to a project is a simple task in Unity. Do the following: Click File > New Scene > Basic (Built-in) > Create.
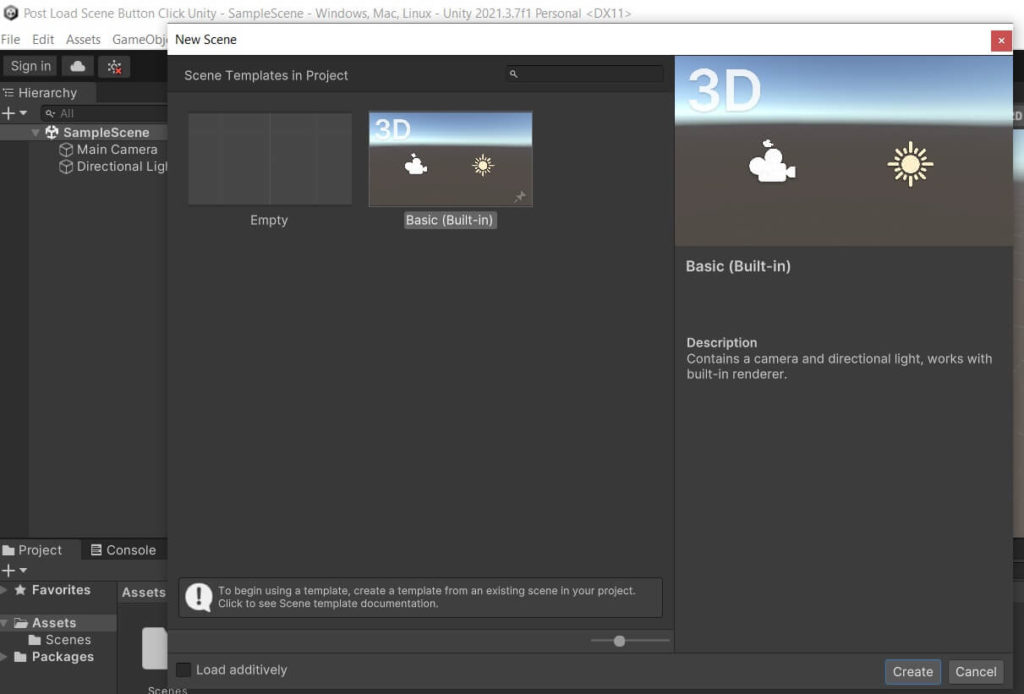
This will create and open a new scene. Note that when you select File > New Scene a pop up box opens in Unity version 2021.3, the version in this tutorial. If you are using a different version of Unity, especially an older one, you may not see this box. You may just be asked to save the scene.
How Do I Make a Button in Unity?
To make a button in Unity, right-click empty space in the hierarchy box, click UI, the click Button.
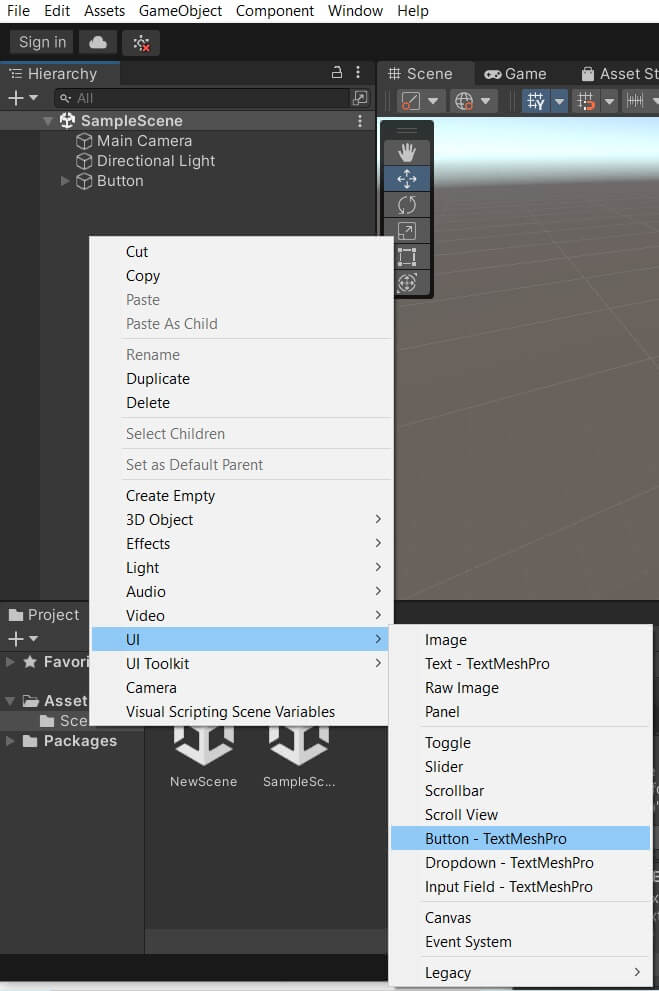
You should now have a button in your scene. You may notice that the Scene View does not show the button properly. You may need to adjust your camera to see the button. Also, notice in the Hierarchy window that a Canvas object was created in the scene as well and that the button is actually a child of the Canvas object.
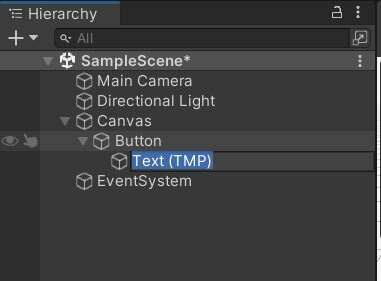
Click on the arrow to the left of the button in the Hierarchy window to show the text information and settings for the button.
At this point, your button will appear in the scene when you run the game. You can click the button, but nothing will happen because you have no code to handle the click. To make something happen, you will need to create a script with the function that will change the scene, along with the On Click event that is attached to the button.
Function to Change a Scene in Unity
Create a C# script file and name it. You can do this by right-clicking in the Project window, the selecting Create > C# script. Delete the Start() and Update() functions. The only function you need is the one that will be used by the button click. For this example, our function will open the next scene in the Build Index. We’ll talk about the build index soon.
using UnityEngine;
using UnityEngine.SceneManagement;

public class ChangeScene : MonoBehaviour
{

    void LoadNextScene()
    {
        SceneManager.LoadScene(SceneManager.GetActiveScene().buildIndex + 1);
    }
}
using UnityEngine; – This is a necessary line of code but is not related to this tutorial.
using UnityEngine.SceneManagement; This line is necessary. It links to the Scene Manager class, that handles things like changing scenes. This line allows us to using functions from that class to handle scene changes.
public class ChangeScene : MonoBehavior – This is just the main class of our C# script.
void LoadNextScene()– This is our function we make. It doesn’t have to be this name, but this is a good, descriptive name for the function. There are also brackets, { }, that encapsulate the code in the function.
SceneManager.LoadScene(SceneManager.GetActiveScene().buildIndex + 1); – This is the line of code that loads the next scene. The LoadScene() function comes from the SceneManager class. GetActiveScene() gets the information for the currently active scene, which includes the buildIndex. The buildIndex stores an integer value for each scene. The count starts at zero.
In this example, we add “1” to the buildIndex, which will load the scene directly after the one you currently have open.
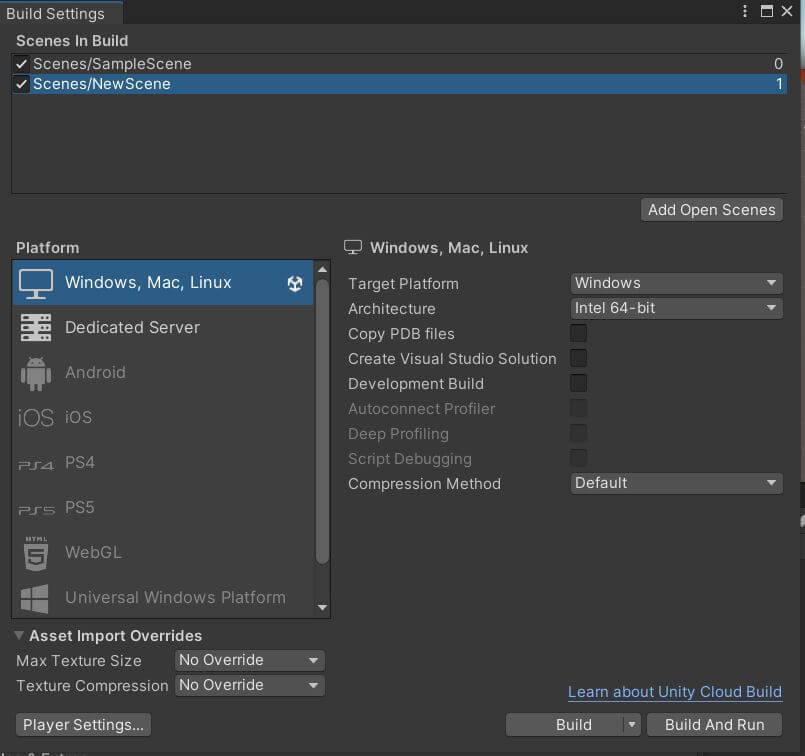
Add Scenes to Build Settings in Unity
In order for you to switch from one scene to another, both scenes need to be in the buildIndex.
To add your scenes to the build settings, click File > BuildSettings…. This will open up the Build Settings Window. Then drag in each scene from the Project window in the order you want them in your game.
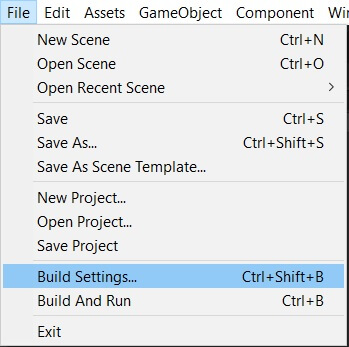
For example, if you have a main menu or title screen in your game that you want to load before the actual levels, make sure to drag that scene in first. It will be in the zero position in the index. If you put them in the wrong order, you can drag each scene above or below another scene. Once you have them in the correct order, just close the Build Settings window.
Add an OnClick Event to a Button in Unity
To add an OnClick event to a button in Unity, select the button in the Hierarchy, then click the plus (+) button in the On Click () section of the Inspector. Finally, add the GameObject your script is attached to and select the function you are using.
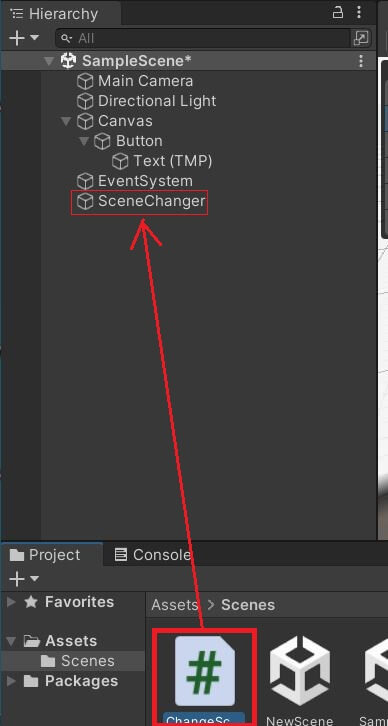
This is what you will do to add your function to your button that will load another scene. First, we need to prepare how the function will be used in the On Click () event. The function needs a way to be found. To do this, we will attach our C# script to an empty GameObject.
To create an empty GameObject, right-click in the Hierarchy, then select Create Empty. You can name it whatever you want. Generally, you will uses some sort of Scene Manager or Game Manager script to handle specific tasks like changing scenes.
Next, drag your script onto the empty GameObject you just made in the Hierarchy.
Now, with the Button selected in the Hierarchy, go to the Inspector, towards the bottom, and click the plus (+) button in the On Click () section. It will open up to where you have to add a few things to it to get it to work. Select the bottom left box and select the empty GameObject with the script attached to you it you created.
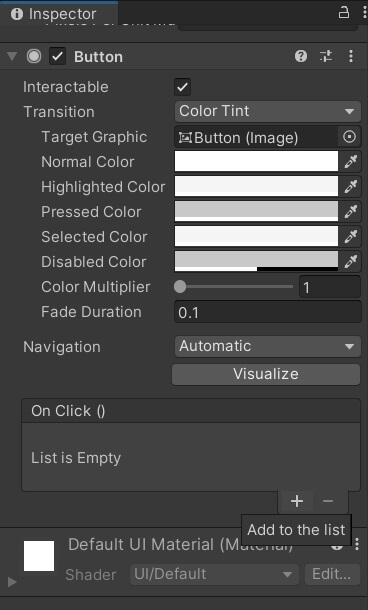
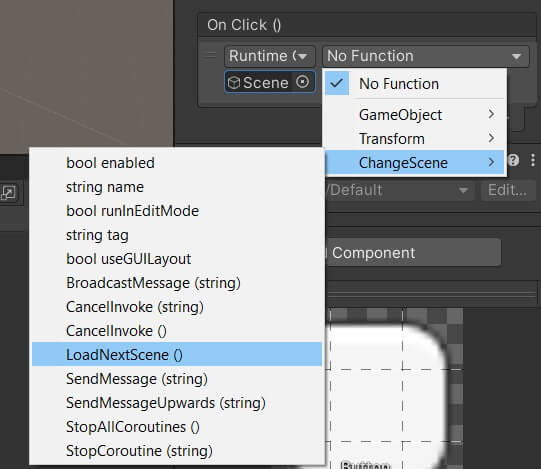
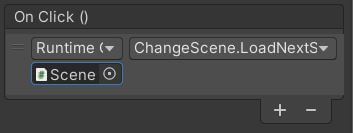
Finally, you can select the box on the right, select the C# script, then select the name of the function in that script you are using to change the scene. At this point everything should be working! Test it out.
This is a general method to use a button to change scenes, and there are also several ways you can change a scene in code. Depending on your game, you have a lot of choices. You are not limited to adding “1” to the buildIndex.