Change Scenes in Unity
Unity projects generally will have multiple scenes, and at some point in your app, you will have to change in between those scenes.
To change scenes in Unity, use the UnityEngine.SceneManagement namespace in your script file. Then in your class, use SceneManager.LoadScene() to load the scene you added to the build index.
In order to switch scenes, you will need some sort of trigger to run the LoadScene() function. Some examples of this would be pressing a button, colliding with or entering an object, or getting achieving a specific score in a level. You can then load a certain level, whether it’s in a certain order or not. We will cover all of this in this post.
How Do You Restart a Scene in Unity?
First thing’s first. If your character dies in a game’s level, and you want the player to have another chance at the level, you can reload the scene the player is currently in. This is just like restarting a level. Remember to add any level, or scene, in your app to the build index. Check how to do that in this article: Load A Scene on Button Click in Unity
Here’s the code you will need to restart a scene in Unity:
using UnityEngine;
using UnityEngine.SceneManagement;

public class ChangeScene : MonoBehaviour
{

    private void Update()
    {
        if (Input.GetKeyDown(KeyCode.R))
        {
            ReloadLevel();
        }
    }

    public void ReloadLevel()
    {
        SceneManager.LoadScene(SceneManager.GetActiveScene().buildIndex);
    }
using UnityEngine.SceneManagement; – You need this namespace to get to the classes and functions used for loading scenes.
if (Input.GetKeyDown(KeyCode.R)) – In this first example, we are restarting, or reloading, the scene when the user taps the ‘R’ key on the keyboard. We use an if statement to check if the R key is pressed. You need to access the Input class, then the function GetKeyDown() to see if the key was pressed. Then Use the KeyCode enumeration with the name of the key you want to have pressed.
ReloadLevel(); – After you check if the R key was pressed, you run the function that will restart the scene. This function is made by the programmer. The name of the function is not important. The code inside it is what’s important. This line of code only calls this function and runs the code inside of it.
public void ReloadLevel() – This is where we declare the function we made to hold the code that restarts the scene.
SceneManager.LoadScene(SceneManager.GetActiveScene().buildIndex); – This is the code that actually changes the scene. There’s a lot to it, so we will break it down. First SceneManager is the class that has all the functions to manage scenes. LoadScene() is a function in that class that loads a specific scene by its name or index number in the build index.
GetActiveScene() gets the information for the currently active scene, or the scene that is currently running, what you see on your monitor. GameObjects can be loaded and manipulated in the current scene. Finally, buildIndex gets the integer value of the the scene. In this case, since you used GetActiveScene(), the buildIndex will return the value of the current scene.
And that is all the code you need to restart a scene in Unity. At the end of this article, we will have an example of this, and loading scenes in several different ways so you can get a feel for what you do when you have multiple scenes in your game or app.
How Do I Load the Next Scene in Unity?
It is fairly simple to load the next scene in your app. This means the same as loading the next scene in your build. It uses the same line of code we used to reload the current scene with one small addition. Here’s the code for it:
SceneManager.LoadScene(SceneManager.GetActiveScene().buildIndex +1); – Remember, we need the SceneManager to access all the functions to load scenes, then we use LoadScene() to actually load a scene, then access SceneManager again to get to the GetActiveScene() function, which returns the value of the currently loaded scene. Then get the buildIndex value of that scene. Finally, we add 1 to the buildIndex.
Why do we add 1 to the buildIndex in this case? Remember, the buildIndex has a list of integer values starting at 0. So 0,1,2,3… and keeps going until it has a value for every scene in the index. When you start on scene 0, and you want to load the next scene, which is 1 in the index, all you have to do is add 1.
So the line of code above basically says, we are going to load a scene, and it will be the active scene. We are going to find the active scene’s buildIndex integer value, then we are going to add 1 to it to load the next scene in line.
Change Scene in Unity On Trigger
Many levels in games use trigger colliders, a goal area, to load a new scene advancing to the next level. So how do you change a scene with a trigger in Unity?
The player and trigger GameObject must both have colliders, one must have a Rigidbody attached, and you must select Is Trigger on the trigger GameObject.
You will generally have a player GameObject touching another object on the screen to end the level. Note that the trigger GameObject does not have to be visible with a mesh, but it will need a Collider and Rigidbody attached to it.
Create a GameObject that will be used for the Player. In this case it is a cube named Player. Create a GameObject to act as the trigger to the next level. For this example it will be a capsule named End Trigger.
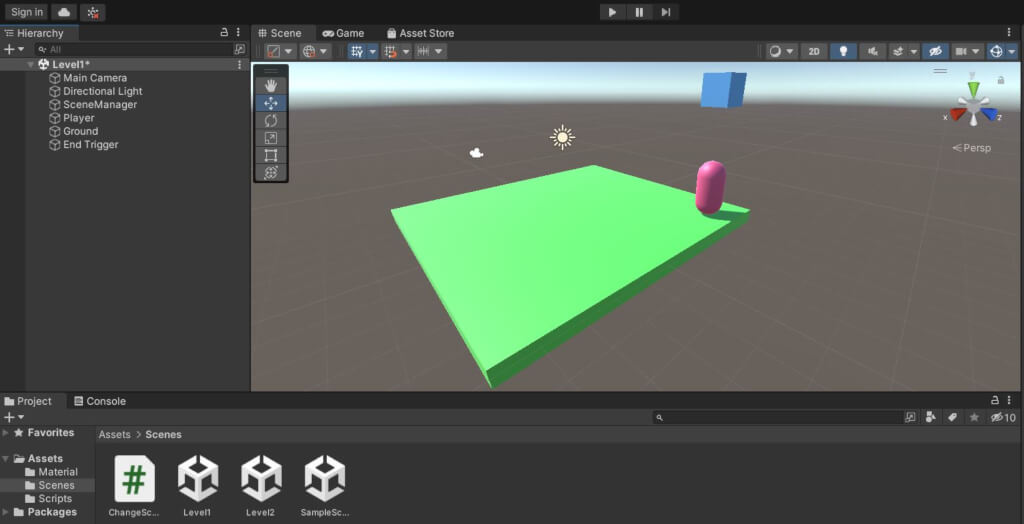
Then select the the End Trigger in the Hierarchy which will display the Inspector. Int the inspector, make sure to add a RigidBody component (1), then in the Collider component, check the box for Is Trigger (2). Note that if you do not want the trigger GameObject to be seen, you can uncheck the box to de-activate the mesh renderer. It will then be invisible in the scene.

Finally, for this method you will need to add tags to the Player and the End Trigger object. Create a tag for Player if it is not already made. Select that tag for the Player in the Inspector. You can create a tag for the End Trigger GameObject and set that tag in the Inspector, but you do not necessarily need it in this example
Here is the script that is attached to the EndTrigger GameObject:
using UnityEngine;
using UnityEngine.SceneManagement;

public class EndTrigger : MonoBehaviour
{

    private void OnTriggerEnter(Collider other)
    {
        if(other.CompareTag("Player"))
        {
            LoadNextScene();
        }
    }

    public void LoadNextScene()
    {
        SceneManager.LoadScene(SceneManager.GetActiveScene().buildIndex + 1);
    }
}
As you can see, the LoadNextScene() is exactly the same as above. The only difference here is the OnTriggerEnter() function.
private void OnTriggerEnter(Collider other) – This function’s parameter takes in the information from the Collider class for the GameObject that has entered the trigger GameObject. In this case that parameter is named other.
if(other.CompareTag(“Player”)) – Next, inside the OnTriggerEnter() function, we check if the GameObject that has entered the trigger GameObject’s collider, is named Player. If the GameObject that entered is tagged as Player, then the rest of the code will execute. In this case, we will access SceneManager again and load the next scene in the build index.
Note that we use the CompareTag() function instead of the “==” operator to see if the tag on the GameObject that collides with the trigger GameObject is Player. This is because does not take as much of a toll on app performance. And that is all you need for using a trigger Collider on a GameObject to access another scene in the game.
How to Load a Random Scene in Unity
Most scenes in games progress chronologically, but you may want to load a random scene sometimes. It may seem complicated, but it really is not.
To load a random scene in Unity, use Random.Range() to include the scenes in the index, and set it to an int variable. Then use SceneManager.LoadScene() and use the int variable as the parameter.
Here is the code that you need to load a random scene:
public void LoadNextScene()
    {

        int sceneIndex = Random.Range(0, SceneManager.sceneCountInBuildSettings);
        SceneManager.LoadScene(sceneIndex);
    }
int sceneIndex = Random.Range(0, SceneManager.sceneCountInBuildSettings); – This is where you find your random scene. int sceneIndex is where you store an integer that is found by the Random.Range() function.
Random.Range() returns a random value between two numbers specified in its parameters. One of the two numbers in the parameters can be returned since they are included the range.
So if you wrote Random.Range(0, 2) it would return zero, one, or two.
The two parameters that define the range for this example are 0 and SceneManager.sceneCountInBuildSettings. The first scene added to the Build Settings has an index value of zero, and SceneManager.sceneCountInBuildSettings has an index value of the total number of scenes in the Build Settings. Therefore every scene in the Build Settings will be included in Random.Range().
Load a Scene With a String Name in Unity
You can also load a scene in Unity by using the string name of the specific scene as well. This is also straightforward.
To load a scene with a string name in Unity, use the LoadScene() function with the “SceneName” as the parameter in the function.
SceneManager.LoadScene("Level2");SceneManager.LoadScene(“Level2”); – LoadScene() here will load the scene named Level2. Remember to write the scene name within two quotation marks.
LoadScene.Single, LoadScene.Additive, LoadSceneAsync
Most of the time you need unload a scene and then load a new scene or even start loading a scene in the background. Here are the ways to do these things.
SceneManager.LoadScene("Level2", LoadSceneMode.Single);SceneManager.LoadScene(“Level2”, LoadSceneMode.Single); – As already shown, this line of code will load the scene name “Level2”. You can add an extra LoadSceneMode parameter to specifiy whether you want to unload the current scene and load the new scene, or keep the current scene and load the new scene as well.
LoadSceneMode.Single makes sure that the current scene is unloaded and the new scene is loaded so that it is the only scene loaded.
SceneManager.LoadScene("Level2", LoadSceneMode.Additive);SceneManager.LoadScene(“Level2”, LoadSceneMode.Additive); – Instead of using the .Single property, we are using .Additive. This property will load the new scene, but will not unload the current scene. Therefore, both scenes will be loaded in the same view. It’s like two universes taking up the same space at the same time. See the image below.

As you can see in the Hierarchy on the left both Level1 and Level2 scenes are loaded and can be active at the same time.
AsyncOperation asyncLoad = SceneManager.LoadSceneAsync("Scene2");AsyncOperation asyncLoad = SceneManager.LoadSceneAsync(“Scene2”); – AsyncOperation is the class need to use LoadSceneAsync. It is a coroutine that allows that allows a process to be run in the background. LoadSceneAsync() is used to load a scene in the background while another scene is already loaded.
This can be used for loading a new scene/level while a loading screen/scene is being displayed. Remember you will use this as a coroutine.