How to Trigger Audio in Unity
If you’ve ever played a game on mute, you will definitely notice a difference in gameplay even though most of the time, sound effects do not directly affect gameplay. You want sound in a game. So how do you trigger sound?
To trigger audio, you need to use the AudioSource class and a method like Play(), PlayOneShot(), or PlayClipAtPoint() to play the sound. The sound must be somewhere in the editor’s Assets folder and be referenced as a variable in a script that is attached to a gameobject that handles sound.
As stated earlier, AudioSource is the class used to play sounds in Unity. They following are the most commonly used:
- Play() – This function plays an audio clip.
- PlayOneShot() – This function, when called, will not cancel another audio clip that is already being played and is good for multiple clips quickly played one after another.
- PlayClipAtPoint() – This function plays an audio clip at a specific position in the scene. This is important and can be used if an object that plays a sound will be destroyed after the sound plays. For example, if a player attacks an enemy and you want a damage sound to play as the the enemy dies and is removed from the scene, the function Play() will not work. PlayClipAtPoint() will work.
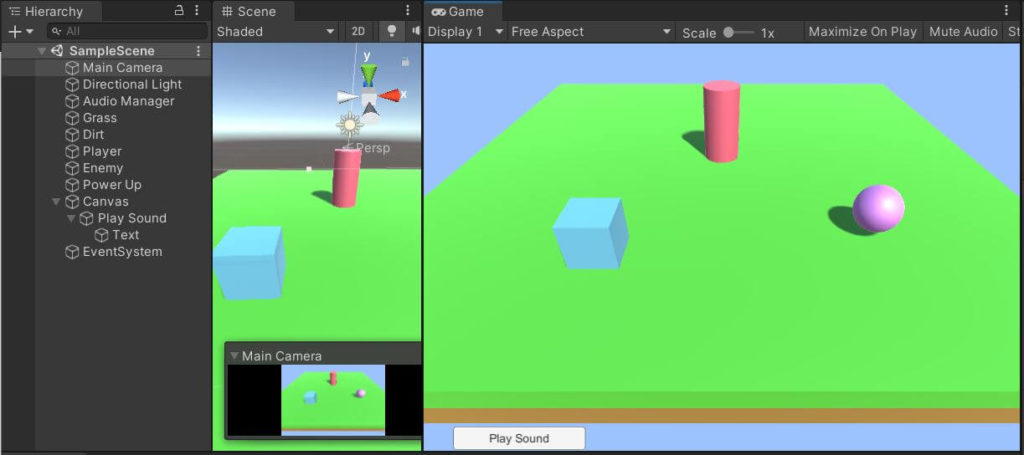
Setting Up Our Scene
Our test scene has a cube (player) that has a player script, a cylinder (enemy) that has an enemy script, and a sphere (power up) that has a powerup script. There are also two scaled cubes for the ground. All gameobjects have box colliders and rigidbodys. Make sure to add the scripts onto the objects: the player, enemy, and sphere. Also, make sure to select ‘Is Trigger’ in the Collider component of the power up.
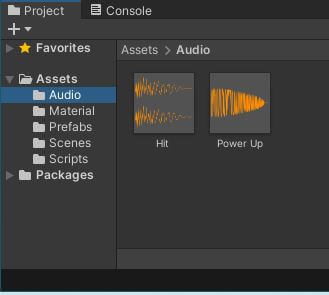
Make sure you bring your audio files into Unity. For better organization, you should make a subfolder in the Assets folder and name it something like Audio.
Next, click on each of your audio files and in the inspector, de-select Play On Awake. If you do not, the sound will automatically play when the scene loads.

Add Audio to the Power Up
When the player collides and picks up the power up, a sound will be played, and the power up will be destroyed. Let’s get right into the code, and make sure the script is attached to the power up’s gameobject.
public class PowerUp : MonoBehaviour
{
[SerializeField]
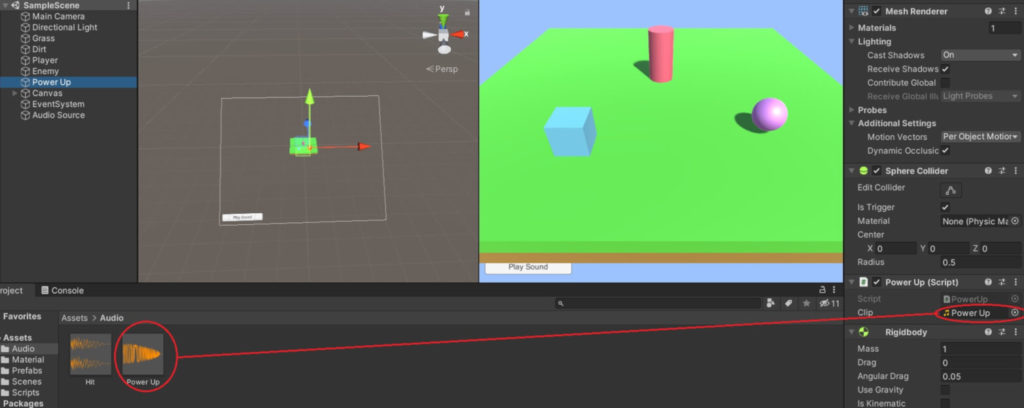
private AudioClip _clip;
[SerializeField] – This allows the private variable below it (or to the right side of it) to be listed in the Inspector window of Unity’s editor. You can then change the value or reference of the variable in the editor instead of having to change it in code. We will use this to associate the audio file with the variable in this script.
private AudioClip _clip; – AudioClip is a class used to hold an audio file. It can either be compressed or uncompressed. Next we create a variable for the AudioClip class to use its functionality in our scipt. This variable is _clip. We will reference _clip when actually playing the audio in our code.
Note that you will need to select the audio file in project window and drag it into the power up’s gameobject script and into the variable that holds the audio file. This will have to be done for each object’s script that plays an audio file.
private void OnTriggerEnter(Collider collider)
    {
        if (collider.transform.CompareTag("Player"))
        {

            AudioSource.PlayClipAtPoint(_clip, transform.position);
            Destroy(gameObject);
        }
    }
Next, we will code the function used to play the audio. In this case what’s happening is when the player gameobject collides with the power up gameobject, a sound will be played before the power up is removed from the scene. We have to be care of what function we use to play the audio clip as you will see.
private void OnTriggerEnter(Collider collider) – The OnTriggerEnter() function stores information from the Collider class about a collision that has happened. We will use OnTriggerEnter() instead of OnCollisionEnter() because our power up is a trigger collider. When another gameobject collides with our power up, the code within this function will execute.
if (collider.transform.CompareTag(“Player”)) – This if statement checks of the gameobject that collided with the power up has a tag called ‘Player.’ If it does, then it will execute the code within the if statement. You can see that it accesses the Collider class, then finds the collision information of the gameobject that collided with the power up. It then accesses the transform component and sees if the tag is the Player tag using the CompareTag() function.
AudioSource.PlayClipAtPoint(_clip, transform.position); – This line accesses the AudioSource class. This class is used to play audio. We access the PlayClipAtPoint() function. This function creates and plays an AudioClip at a certain position in world space. It will then destroy the clip after it has finished playing.
The first parameter, _clip, is the clip referenced in the script. The second parameter, transform.position, causes the audio to play at the gameobject’s transform position.
If you used AudioSource.Play() for the power up, it would not work. This is because the power up is destroyed, or removed from the scene after the player collides with it. PlayClipAtPoint() allows the audio file to be played even after the power up is destroyed, and will play at the transform position of the power up before it was destroyed.
Destroy(gameObject); – This line destroys the gameobject to which this script is attached. Thus the power up gameobject will be removed from the scene.
Play Audio When the Player Collides with an Enemy
This time, after the player touches the enemy gameobject, a sound effect will play, and the player will die. The code for this will be very similar to the power up script.
public class Enemy : MonoBehaviour
{
    [SerializeField]
    private AudioClip _clip;
[SerializeField] private AudioClip _clip; – This is the same as with the power up. Serializing a variable allows you to view and edit its value in the editor’s Inspector window. The variable _clip will store the audio file attached to the enemy.
private void OnCollisionEnter(Collision collision)
    {
        if (collision.transform.CompareTag("Player"))
        {
            AudioSource.PlayClipAtPoint(_clip, transform.position)
            Destroy(collision.gameObject);
        }
    }
private void OnCollisionEnter(Collision collision) – This function is similar to OnTriggerEnter(), however, there is no trigger collider involved in a collision between the player and the enemy gameobjects. We use OnCollisionEnter() instead. The parameter passed in is a reference to the Collision class which has details on the collision that took place.
if (collision.transform.CompareTag(“Player”)) – This if statement checks of the gameobject that collided with the enemy has a tag called ‘Player.’ If it does, then it will execute the code within the if statement.
AudioSource.PlayClipAtPoint(_clip, transform.position) – Again, this line accesses the AudioSource class. This class is used to play audio. We access the PlayClipAtPoint() function. This function creates and plays an AudioClip at a certain position in world space. It will then destroy the clip after it has finished playing.
Destroy(collision.gameObject); – Finally, since touching enemies hurts, this line will destroy the game object that is found by the information stored in the collision class. In this case, the player has collided with the enemy, so the player’s gameobject will be destroyed.
Play a Sound On Click in Unity
As you can see, playing sound clips is fairly simple in Unity. What’s another way we can trigger audio? Let’s try when the user clicks a gameobject in the scene.
To play a sound on click in Unity, use the OnMouseDown() function and inside that function use a function from the AudioSource class, such as PlayClipAtPoint() or Play().
In this example, we will click the enemy and cause a sound to play. Therefore, this code will be part of the script attached to the enemy’s gameobject.
private void OnMouseDown()
    {
        AudioSource.PlayClipAtPoint(_clip, transform.position);
    }
private void OnMouseDown() – This function is called when the left mouse button is clicked on a an object in the scene. It is a click event where when you click the object, code within this function will execute.
AudioSource.PlayClipAtPoint(_clip, transform.position); – This line accesses the AudioSource class and the PlayClipAtPoint() function. This function creates and plays an AudioClip at a certain position in world space; in this case it is the position of the enemy gameobject. It will then destroy the clip after it has finished playing. Use PlayClipAtPoint() if the gameobject you click will or may be destroyed.
Make a Button Play a Sound in Unity
Another way to trigger audio is to click a button. This is fairly straightforward as well.
To use a button to play audio in Unity, create a button and AudioSource object in the Hierarchy. Drag the audio into the Audioclip box of the AudioSource’s Inspector. Add an on click event in the Inspector, and drag the AudioSource object into it. Select AudioSource > AudioSource.Play in the function dropdown listbox.
First, we will use a new scene with a button for this example. Right-click the Hierarchy window and select UI > Button. This will add a Canvas with a button into the scene. Next, you need a gameobject with an Audio Source component attached to it in the scene. Right-click the HIerarchy window again and select Audio > AudioSource.
Next, select the Audio Source in the Hierarchy and in the Inspector, you will see AudioClip and a selector to add an audio file to it. Drag your audio file asset into that box.
Now select your button in the Hierarchy and in the Inspector, scroll to the On Click () event. You will see that it is empty, so click the plus (+) button. There is a selector box for a gameobject. Drag your Audio Source gameobject form the Hierarchy into that box. Now you will have options to select a function. So Select Audio Source > Play () in the function selector.
And that’s it. You should be able to click the button with your mouse and a sound will play.
Wrap Up
So as you can see, to play a sound, you need to use the AudioSource class and it’s functions. The process is straightforward, but you may need a certain function for specific circumstances. You can trigger a sound in many ways, including on a mouse click or key press, in a collision, and more.