Unity Scripting Tutorial
Scripting in Unity allows a developer to manipulate GameObjects to perform specific actions. Learning scripting is integral to creating a fun and interactive experience for a player.
There are several functions, or methods, in Unity that handle much of the code execution. Unity also has best practices for when and why you would use a specific function. This article will be a brief overview and tutorial for several of the core functions in Unity.
Remember that a function is a set of programming instructions that are packaged in a function definition. It’s basically a container for code that will be executed when called in the application.
Unity Scripting Concepts
To create a script, select the “Assets” button in the top menu. Then select “Create” > C# Script.

There are some basic things you should know about scripting. One thing is that Unity’s built-in functions, that means functions that you do not create, have a specific order of execution. For example, during the initialization period, these functions are executed in the order here: Awake() then OnEnable() then Start().
Another thing to think about is that certain functions should handle specific events for the best performance and reliability of an application. For example, both Update() and FixedUpdate() can handle movement of GameObjects. However, when you are handling movement of a GameObject with Unity’s built-in physics engine, you should used FixedUpdate().
When creating variables, they can appear in the Unity Editor as well. This will allow you to manipulate the values of the variables either before the application is launched or even during the application is launched. A public variable will automatically be displayed in the Inspector Window.
You can also use the SerializeField class to allow a private variable to be displayed in the Inspector Window. For example, see below:
[SerializeField]
private int health = 100;

//or

[SerializeField] private int health = 100;
Namespaces are used to represent multiple classes that are referenced when using the namespace. You can then use the functionality of those classes in your script file. For example, if you need to reload a scene or switch to a different scene, you use the following namespace at the top of the script file to access its classes and functions. See below:
using UnityEngine.SceneManagement;Unity Functions Examples
Below is a list of functions and what they are generally used for. These are some of the main functions you will be using. Please note that there are many, many more functions that can be used in Unity.
1. Awake()
This is the first function called, and it is called when a script is being loaded. It is called only once when a script is initialized. In Awake() you can initialize variables and states before the application starts. You can also use this function to create references between other scripts. Note that Awake() is called even if the script is currently disabled while being attached to a GameObject.
It is also recommended that you use Awake() instead of a constructor since it is only called once.
//Class to reference
PlayerController playerController;
[SerializeField] GameObject player;

void Awake()
{
    playerController = player.GetComponent<PlayerController>();
}
2. Start()
This function is called on the frame in which a script is enabled. It is called only once per script instance, just like Awake(). It is called after Awake(). Use it to pass any information back and forth between scripts.
Start()
{
    playerController.disabled = true;
}
3. Update()
Update() will be called every frame while the application runs, so whatever code you include in this function will run each frame. For example, if you want to get input from the player and make a GameObject move, you can do it here.
//movement speed variable
private float speed = 5f;

Update()
{
    //get the Input from Horizontal axis to use the w, a, s, d or arrow keys for movement
    float horizontalInput = Input.GetAxis("Horizontal");
    //get the Input from Vertical axis
    float verticalInput = Input.GetAxis("Vertical");

    //update the GameObject's position
    transform.position = transform.position + new Vector3(horizontalInput * movementSpeed *
    Time.deltaTime, verticalInput * movementSpeed * Time.deltaTime, 0);
In the case of this example, we get the values of the Horizontal and Vertical virtual axes that are built into the Input Manager. These allow for basic movement of a GameObject.
You then get the GameObject’s transform position and add it to the values of a Vector3 that includes the multiplication of horizontal and vertical axes values and a speed variable created above. Finally, you multiply it by Time.deltaTime to slow down the GameObject’s movement.
Remember, this movement is not based on the physics engine, so you would not need to use FixedUpdate().
The Update() function is an acceptable place to call the Input class to handle user input. You can also execute timers and other things in the Update() function.
4. FixedUpdate()
FixedUpdate() is used similarly to Update(), however, it is framerate-independent. The framerate does not dictate how many times FixedUpdate() is called. It is called at whatever frequency the physics system is running, every .02 seconds by default. Anything physics based should be called in FixedUpdate(). If you add a RigidBody to a GameObject, use FixedUpdate() to move it.
 [SerializeField] private float thrust = 5f;
 Rigidbody rigidBody;

 private void FixedUpdate()
 {
     rigidBody.AddForce(transform.right * thrust);
 }
As you can see, we are using a RigidBody which uses Unity’s physics engine. Because we are using a RigidBody, we move it with a physics based function, AddForce(). All of this takes place in FixedUpdate so that it is not framerate dependent.
5. OnCollision…()
When GameObjects move into each other’s space, you need a function that handles these collisions and executes code to cause the desired effect of the collision. The Collision class includes the function OnCollisionEnter(), which is used frequently. This function detects when one GameObject touches another one.
You can use this to handle when your player takes damage or when your player reaches a goal area that ends a level, among other things.
private void OnCollisionEnter(Collision collision)
{
   if (collision.gameObject.tag == "Enemy")
   {
   Destroy(gameObject);
   }
}
Here you can see that OnCollisionEnter() uses the Collision class to get collision data. In this example, the script is attached to the Player GameObject. If that GameObject’s collider touches a collider from a GameObject with the “Enemy” tag, then the Player GameObject is destroyed and removed from the scene.
6. OnTrigger…()
Another function that is part of the Collider class is OnTriggerEnter(). It is used to detect collisions between a GameObject that has a Collider component and a GameObject that has a collider Component but also has the isTrigger flag set to true. The GameObject that is the Trigger should also have a Rigidbody attached to it.
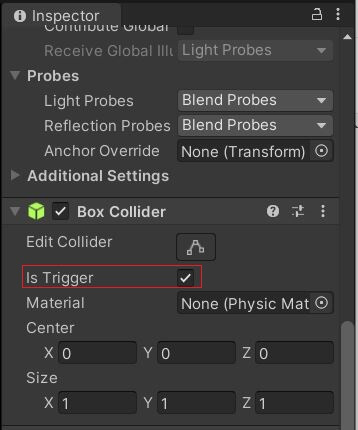
OnTriggerEnter() is called in the FixedUpdate() function since it is physic-based. Note that when a GameObject is a Trigger GameObject, another GameObject that has a Collider will physically pass through the Trigger GameObject’s Collider. Below is an example of what happens when a player collides with a power-up GameObject that is a Trigger.
private void OnTriggerEnter(Collider other)
    {
       Player player = other.transform.GetComponent<Player>();
        if (other.gameObject.CompareTag("Player"))
        {
            player.SpeedUpEnabled();
            Destroy(this.gameObject);
        }

    }
Note that the OnTriggerEnter () function accepts information from the Collider class, just like OnCollisionEnter().
First, you get a reference to the Player GameObject. Then you check if a GameObject that collided with the Trigger Collider is the Player GameObject. If it is, a function attached to the Player GameObject is called to increase the Player’s speed and the power-up GameObject is destroyed.
If you want to see a full tutorial about temporary power ups, click here.
Conclusion
As you’ve seen, Unity has core functions that control everything in a Game. There are functions that are called when a GameObject is initiated, Awake() and Start(). There are functions that are regularly called while the application is running, Update() and FixedUpdate(). And there are functions that are called when a specific event happens in an application, OnCollisionEnter() and OnTriggerEnter().
Remember, Unity has many built-in functions to manipulate how an application runs. While the functions discussed here are some of the main building blocks of Unity scripting, there are many more functions you should know to greatly improve your ability to create fun and complex applications in Unity.