Make a Temporary Power Up in Unity
Temporary power ups are a great way to add more interesting gameplay to your game. In Unity, you can fairly easily make one yourself.
To make a temporary power up in Unity, in the player class create a power up enabled function. Also create a disable power up function as a coroutine to disable the power up after a certain amount of time. For the power up class, check if it has collided with the player, and call the power up enabled function from the player class.
Get the Player Ready For the Power Up
In this example, I will use a simple cube as the player and a smaller cube as the power up. I created a cube in the Hierarchy tab, renamed it “Player”, and in the Inspector window I changed its tag to “Player.” The reason I changed the tag to player is for when the player collides with the power up. The power up script will check if the player collided with the power up by checking the player gameobject’s tag.
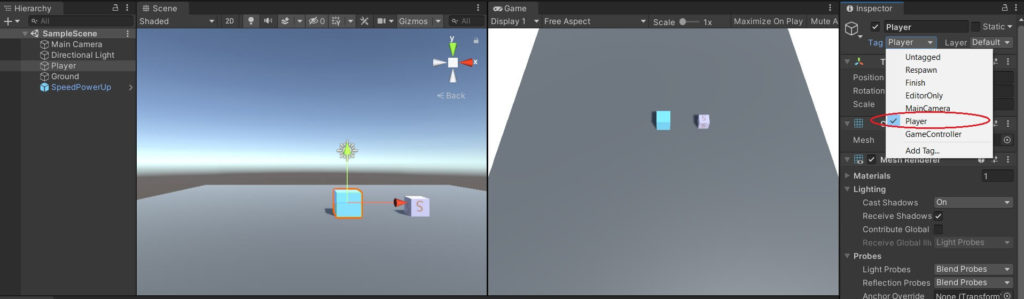
Next, create another cube for the power up. I scaled the cube down to .75 for each attribute and added a material with a letter S on it to represent the word speed. I renamed it to “SpeedPowerUp.” This will be a speed power up.
Create a new script named “Player” and another script named “TempPowerUp.” Attach the Player script to the Player gameobject and the TempPowerUp script to the SpeedPowerUp gameobject. Now let’s get to some code. The following lines of code will be in the Player script.
using System.Collections;
using System.Collections.Generic;
using UnityEngine;

public class Player : MonoBehaviour
{
    [SerializeField]
    private int speed = 5;
    private int speedBoost = 5;
[SerializeField] – This code allows for the variable right below it to be viewed and edited in the Inspector window of the editor. In this case it allows our speed variable to be viewed.
private int speed = 5; – This line creates a private variable called speed and sets the value to 5. ‘private’ is an access modifier that protects the variable from being edited by outside class functions. ‘int’ is the datatype of the variable; in this case it is an integer. ‘speed’ is the variable’s name. ‘= 5’ sets the variables value to 5. This variable will be used for the player’s speed.
private int speedBoost = 5; – This creates another integer variable named speedBoost. This variable will be multiplied by our speed variable to make the player faster once they collect the power up.
Move the Player with Transform.Translate
The next part is not specific to this example, but we’ll use it to move our player into the power up.
void Update()
    {
        float horizontalInput = Input.GetAxis("Horizontal");
        float verticalInput = Input.GetAxis("Vertical");

        Vector3 direction = new Vector3(horizontalInput, 0, verticalInput);

        transform.Translate(direction * speed * Time.deltaTime);

    }
void Update() – is a function in Unity that is called many times a second and can be used to perform things like moving a character the way we are in this example.
float horizontalInput = Input.GetAxis(“Horizontal”); – This creates a float variable named “horizontalInput” and assigns the value of the horizontal value of the Input class to the variable. “Input.GetAxis(“Horizontal”)” accesses the horizontal direction value. By default, you can use the ‘a’ or left arrow key to move a gameobject negatively along the x axis in the scene. You can use the ‘d’ or right arrow key to move it positively along the x axis.
Vector3 direction = new Vector3(horizontalInput, 0, verticalInput); – This line creates a vector3 structure which holds 3 values mainly used for storing 3D positions and directions. The vector3 is named direction. Note that the values in the Vector3 are the x, y, and z values.
The horizontalInput variable value is assigned to the x parameter in the Vector3 because that will allow the player to move left and right on the screen, and the y value is 0 because we are not going up and down. The verticalInput variable value is assigned to the z parameter allowing the player to move forward and backward on the z axis.
transform.Translate(direction * speed * Time.deltaTime); – transform.Translate moves a transform in the direction and distance specified by its parameters. The function takes in the direction Vector3 that stores x, y, and z values.
We then multiply it by speed to get movement and multiply that by Time.deltaTime to move a specific distance per frame. deltaTime is the time value in between each Update() call. It will smooth out values between movement. If you remove Time.deltaTime you will see how movement is affected.
Enabling the Power Up
We want the player to speed up for a short amount of time after after they touch the power up. After that time is up, they will return to normal speed. Below is the code for two functions that will be used together to speed up and slow down the player. It’s better to show both at once so you can see how they interact.
public void SpeedUpEnabled()
    {
        speedUp = true;
        speed *= speedBoost;
        StartCoroutine(SpeedUpDisableRoutine());
    }

    IEnumerator SpeedUpDisableRoutine()
    {
        yield return new WaitForSeconds(3.0f);

        speed /= speedBoost;
    }
public void SpeedUpEnabled() – This declares a function named SpeedUpEnabled. Everything inside the brackets belong to this function. This function will increase the player’s speed.
speedUp = true; – This line sets the boolean speedUp variable we declared in the beginning to true. This allows us to know that the player has touched the power up and increased its speed.
speed *= speedBoost; – This line increases the speed of the player. It multiplies the speed variable by the speedBoost variable we declared in the beginning. So in this case the speed variable would = speed, or 5, multiplied by speedBoost, or 5. This would equal a value of 25 for the player’s speed.
StartCoRoutine(SpeedUpDisableRoutine()); – This line calls/starts the coroutine SpeedUpDisableRoutine(). This will execute the code in that coroutine. We will discuss what that does below. A coroutine is a function that can stop the execution of its code until it is told to stop.
IEnumerator SpeedUPDisableRoutine() – This is the coroutine. It is called in this line. All code between its brackets will be executed after the yield statement has completed.
IEnumerator performs iterations and allows you to iterate between objects in a list. This is what can control the stopping and resuming of the coroutine.
yield return new WaitForSeconds(3.0f); – This line is the yield instruction for the coroutine. yield causes the coroutine to hold execution until specific instructions have been completed. In this case, WaitForSeconds(3.0f) must finish before the coroutine can execute.
The WaitForSeconds() function stops the coroutine execution for the amount of seconds passed. It has a parameter for how many seconds it should wait. This line will wait for 3 seconds before allowing the coroutine to execute. After the 3 seconds is finished, the line below is executed.
speed /= speedBoost; – This line takes the current speed of the player and divides it by the speedBoost variable and sets that to the current speed. So for this example, after the player has had the speed power up for 3 seconds, their current speed, which is 25 will divide by 5 thus setting the speed to the normal speed.
Creating a Speed Boost Power Up Script
The player’s script is complete. We still need to code the power up’s script for everything to work. See the code below.
using System.Collections;
using System.Collections.Generic;
using UnityEngine;

public class TempPowerUp : MonoBehaviour
{
    private void OnTriggerEnter(Collider other)
    {
        Player player = other.transform.GetComponent<Player>();
        if (other.gameObject.CompareTag("Player"))
        {
            player.SpeedUpEnabled();
            Destroy(this.gameObject);
        }

    }
}
private void OnTriggerEnter(Collider other) – This is a function that checks if an object collided with another object that is set to have a trigger collider in the Inspector. Remember that we set our speed power up gameobjects to have trigger colliders. This allows the player to pass through them as they appear to be picking them up.
The parameter for this function, Collider other, gets the collider information of the object that collided with this one. That may have sounded weird, sorry. But that is about the simplest way to explain. So in our example, OnTriggerEnter() attached to our power up will get the information of the box collider on the player gameobject.
Player player = other.transform.GetComponent<Player>(); – This line references the Player script and creates an object called player. The player’s transform component is then accessed using other.transform.Getcomponent<Player>(); This will be used to access the function that controls the speed up of the player in the player’s script.
if (other.gameObject.CompareTag(“Player”)) – This line, using the CompareTag() checks if the gameobject with the tag “Player” has collided with the power up. If it has, then it will execute the following lines of code.
player.SpeedUpEnabled(); – This line accesses the Player script using the player reference that was declared a few lines above. It then executes the SpeedUpEnabled() function in the Player script, which speeds up the player.
Destroy(this.gameObject); – This destroys the gameobject this script is attached to, the power up.
Adding More Functionality to the Power Up
This is a basic way to create a power up. You can do many things with power ups, including spawning them in certain locations, destroying them if the player hasn’t gotten them after a certain amount of time, moving them around, and more. In the future, I will write another article with things like this to make your power ups even more dynamic and fun.